
Choose where your energy goes.
Hey Loves! Social media can be very effective when it comes to bringing traffic to your blog but if you use it properly, you can get amazing opportunities as well! The first step is to use professional templates and graphics so your blog can stand out from the crowd and speak for itself.
If you’re struggling with designing social media templates then I got you covered, I’ve included a free social media pack in this blog post which includes Instagram, Twitter, Pinterest and Facebook templates!
All these templates can be used in Photoshop and Canva but I’ll be showing you how to customise these templates using Canva so it can give you an idea of how you can customise and edit these templates up to your preferences.
Related: How to create custom images for your blog posts
Tutorial
OPEN THE TEMPLATE
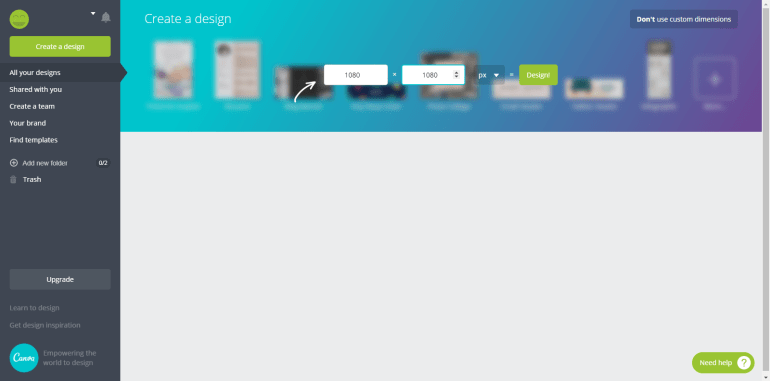
Once you’ve logged into your account, the first step you’ve to do is to create a design with custom dimensions so go to the tab All your designs and then click on the button in the top right corner Use custom dimensions. Then enter the dimensions of the design depending on the template you’re going to open, in this case I’m going to open an Instagram template so it’s 1080×1080.
✘ Facebook & Twitter: 1200×630
✘ Pinterest: 737×1102
✘ Instagram: 1080×1080

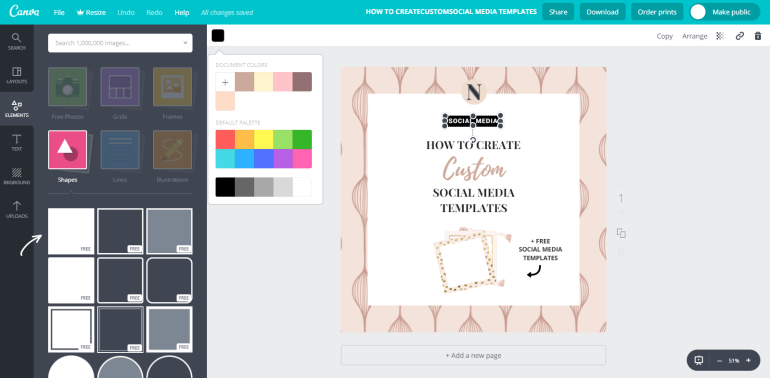
Then, go to the tab Uploads and click on the option Upload your own images in order to upload the template into the design. Now, you’re able to drag and drop the template into the design.


Once the template is uploaded, resize the template to its original dimensions. For that, you need to position the template in the top left corner and drag the template up to its original size, the dimensions will be shown so it’ll be very easy. (note: check the dimensions mentioned above)
LOGO

Once you’ve uploaded your logo, the next thing you’ve to do is to customise it which is completely optional. Select your logo, then click the option Filter and multiple options will appear, each filter has different settings so you can play around with these options and see which one you like the most. In this case, I went with the filter called “Cali”.
OBJECTS
You can add many types of objects in Canva such as shapes, lines, illustrations, etc. I’ve talked about it in this post so if you’re interested then make sure to check it out! To add a rectangle, go to the Elements tab and click on the option Shapes then choose which rectangle you want to add, in this case I’ve chosen the first one. Afterwards, you can scale and customise the rectangle up to your preference.
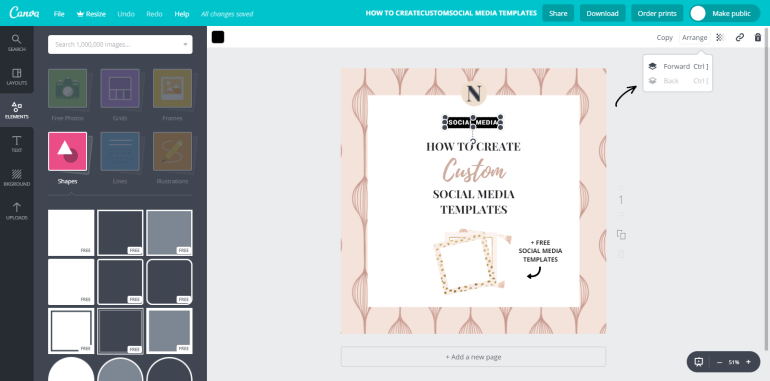
In addition, you can arrange any objects in your design by putting it in the back or in the front of an image/text using the Arrange option.

As I mentioned previously, you can add any objects in Canva. To add an arrow of your choice, simply go to the tab Search and type “arrow” in the search bar then multiple options will be shown and select the one you like.
TEXT
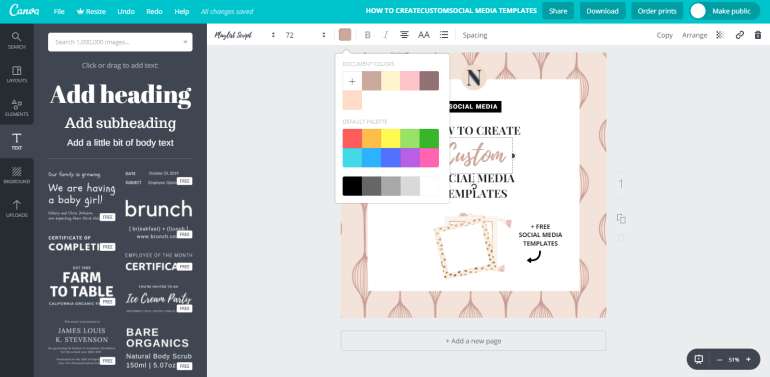
Go to the tab Text and click & drag the text you want from the left side, if you don’t like a font then don’t worry, you can still browse through the font options that are available and select the one you like. Also, you can change the size and colour of the font as well according to your preference.
SAVE THE TEMPLATE
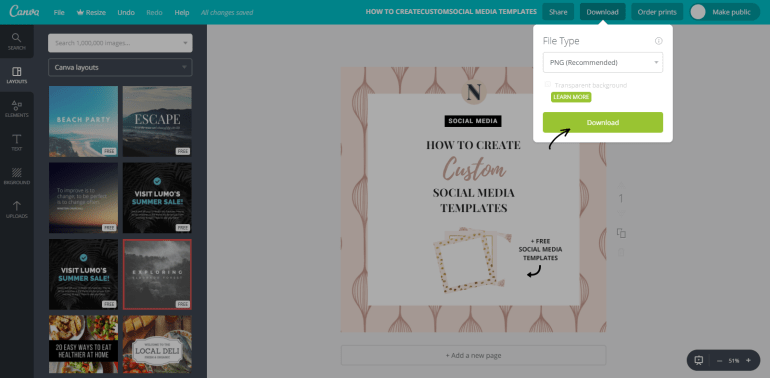
Once you’ve finished all the editing and are happy with the final result, you can save the template! Click on the Download button and select PNG as the file type then click on Download.
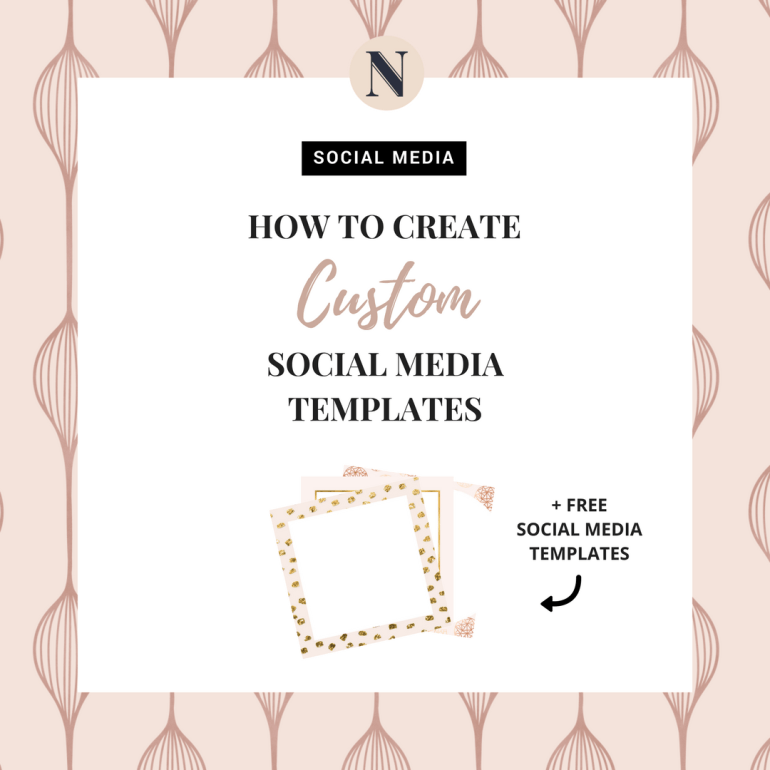
FINAL RESULT
FREE SOCIAL MEDIA PACK

✧ Click here to download! ✧
This pack is perfect for beauty, fashion & lifestyle bloggers, you can promote your blog posts, products, events, literally anything you want on Instagram, Facebook, Twitter and Pinterest using these templates.
DETAILS:
✘ 5 Instagram Templates
✘ 5 Pinterest Templates
✘ 5 Facebook & Twitter Templates
THANK YOU SO MUCH FOR READING!
xo N
