
Gratitude is the best attitude.
Hey Loves! I hope you’re doing well, today I’m going to show how I edit my blog pictures using Photoshop and an alternative option for those who don’t have it at the end of the post. If you’re interested then keep on reading!
You might also like:
OPEN THE IMAGE
Once you’ve opened Photoshop, open the image you’re going to edit (File > Open).
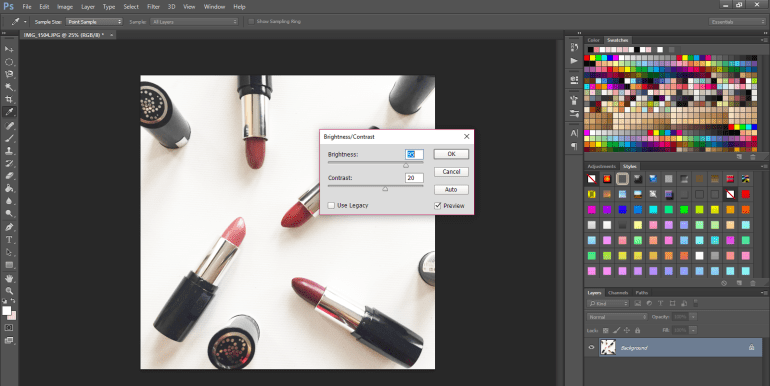
BRIGHTNESS & CONTRAST
The first thing I do is edit the brightness and contrast level of the picture (Image > Adjustments > Brightness/Contrast), I don’t have a specific number – I just choose something that I think looks the best, I don’t want the picture to look too bright or under exposed.
LEVELS
This one is optional but for some pictures, it can be a crucial part depending on the tone of the picture, if you’ve a yellowish or blueish picture then editing the levels of the picture (Image > Adjustments > Levels) will make a huge difference.

SATURATION
Then I edit the saturation of the picture (Image > Adjustments > Hue/Saturation) to make the colours pop up.

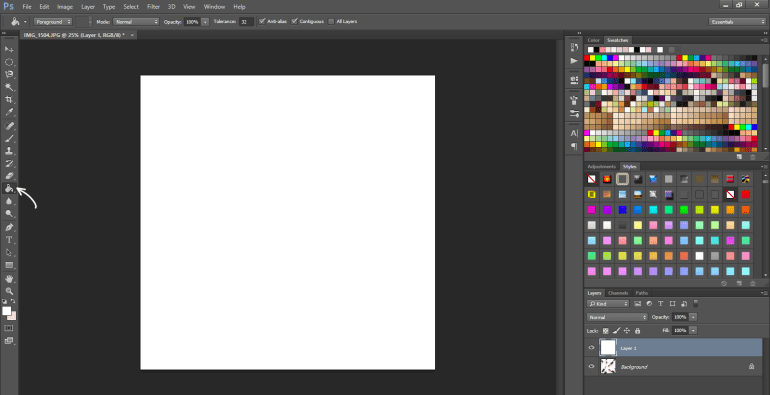
CREATE A NEW LAYER & FILL IT WHITE
After I’ve edited all the basic settings, I create a new layer (Shift+Ctrl+N) and fill it with white colour using the Paint Bucket tool.
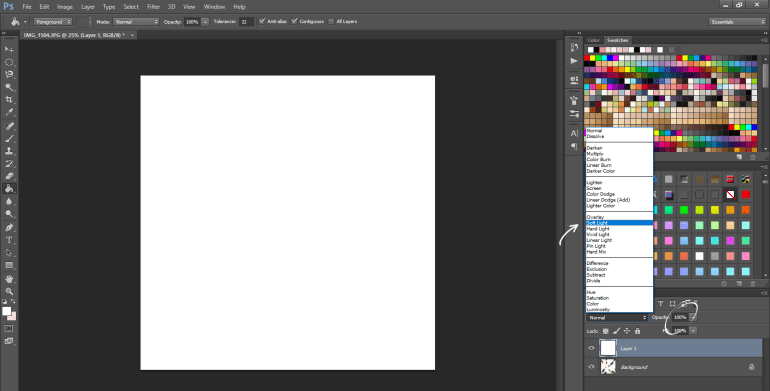
CHANGE THE BLENDING MODE TO SOFT LIGHT
I change the blending mode to Soft Light and afterwards, you can edit the opacity of the layer depending on your preferences. I like to keep it at a minimum level, less than 20 in general. Then I save the picture!
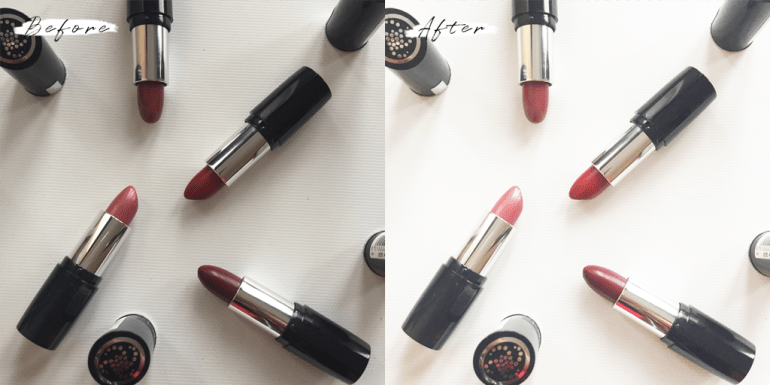
BEFORE & AFTER
AND it’s done! As you can see, here is a before and after picture!
ALTERNATIVES
Photoshop is quite expensive and isn’t accessible for everyone so for those who don’t have it, you can achieve the same effect using some apps on your phone. Here’s a couple of my favourite apps that are similar to Photoshop when it comes to some of the settings:
✘ VSCO CAM
✘ Facetune
✘ Enlight
✘ Lightroom
✘ Photoshop
THANK YOU SO MUCH FOR READING!
xo N
